TechDroider: root

How to Root Moto X4 (Android One)

How to Root Moto X4 (Android One)
You can now Root the recently announced Moto X4 Android One. Rooting your smartphone give you admin rights and lets you do most of the things you want with your device considering get access to anything and everything that way.

Subscribe us on YouTube for Giveaways and Daily Tech Videos:


After rooting, you'll be able to use certain apps which gives you more control over your device. Most popular applications include Titanium Backup, Greenify, WiFi Kill, Xposed, and Root Explorer.


In most of the cases, you need to Install TWRP (Custom Recovery) in order to root your Smartphone. But, Moto X4 Android One can be rooted without Installing the TWRP Recovery. This root method is called CF-Auto-Root.


The below Guide will help you Rooting your Moto X4 Adroid One. Note that, You'll first need to Unlock your Moto X4's Bootloader.

Note: We are not responsible for any bricked devices.

How to Root Moto X4 (Project Fi - Android One)-

Step 1. Download Boot Img file from below .

Step 2. Go into fastboot mode (power off and hold power+vol down and release)

Step 3. Connect the phone to your PC

Step 4. Open ADB and Fastboot on your PC.

Step 5. Run the following command : fastboot boot boot.img

Downloads: Boot Image (Credits: mightysween - XDA)

Also Read:


About Moto X4: Moto X4 comes with a 5.2-inch Full-HD glass layered display with 3D glass on top, Qualcomm Snapdragon 630 2.2 GHz octa-core processor, 3/4GB RAM, 32/64GB storage plus microSD support up to 256GB, Dual Pixel 12+8MP rear camera for the best low-light, zoom and blur background with enhanced image processing, 16MP front camera with Panoramic Selfie, 3000mAh battery with Turbo-charging, IP68 water and dust resistance, and Android 7.1.1 Nougat.

How to Root Xiaomi Mi A1

How to Root Xiaomi Mi A1
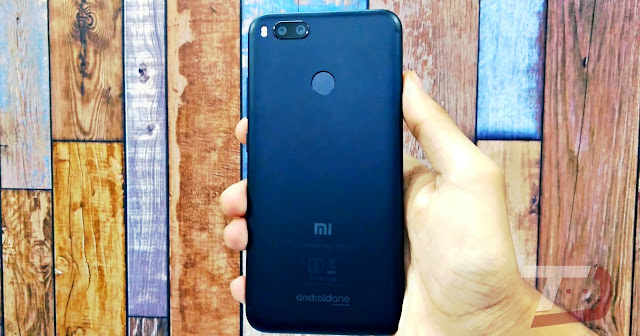
You can now Root the recently announced Xiaomi Mi A1. Rooting your smartphone give you admin rights and lets you do most of the things you want with your device considering get access to anything and everything that way.

After rooting, you'll be able to use certain apps which gives you more control over your device. Most popular applications include Titanium Backup, Greenify, WiFi Kill, Xposed, and Root Explorer.


In most of the cases, you need to Install TWRP (Custom Recovery) in order to root your Smartphone. But, Xiaomi Mi A1 can be rooted without Installing the TWRP Recovery. This root method is called CF-Auto-Root.


The below Guide will help you Rooting your Xiaomi Mi A1. Note that, You'll first need to Unlock Bootloader by following the Official Guide from Xiaomi.

Note: We are not responsible for any bricked devices.

How to Root Xiaomi Mi A1-

Step 1. Download Root Zip file from below .

Step 2. Go into fastboot mode (power off and hold power+vol down and release)

Step 3. Connect the phone to your PC

Step 4. Extract the above Zip File (Step 1.)

Step 5. Run Root.bat

Downloads: Root ZIP (Credits: kraatus90 - XDA)

About Xiaomi Mi A1: Mi A1 comes with a 5.5-inch FHD LTPS IPS LCD display, Qualcomm Snapdragon 625, 4GB RAM, 64GB storage plus microSD support up to 128GB, 12MP Wide Angle + 12MP Telephoto (Same like the iPhone 7 Plus) for the best low-light, zoom and anti-blur photos with enhanced image processing, 5MP front camera, 3080mAh battery, and Android 7.0 Nougat.

You also get a Beautify 3.0, IR Blaster, Confirmed update to Android Oreo by the end of 2017 and Android P whenever it get released.

Root and Install TWRP recovery on Moto G5s Plus

Root and Install TWRP recovery on Moto G5s Plus
You can now Root and Install TWRP on the recently announced Moto G5s Plus Smartphone. It's very simple to Root your Moto G5s Plus after Installing TWRP. You can gain Root access either of Magisk or SuperSU.

Installing TWRP also gives you access to Install Custom Roms and Mods (Including LineageOS, AOSP, and Other Popular Roms). You can also update your device to the latest Android 8.0 Oreo by Installing LineageOS 15 when it becomes available.


The below Guide will help you Installing TWRP and Rooting your Moto G5s Plus with codename Sanders. Note that, You'll first need to Unlock Bootloader by following the Official Guide from Motorola.

How to Install TWRP Recovery on Motorola Moto G5s Plus:

Step 1. Download TWRP recovery from below .

Step 2. Go into bootloader mode (power off and hold power+vol down and release)

Step 3. Connect the phone to your PC

Step 4. Install Adb and Fastboot into your PC

Step 5. From CMD or Terminal go into your the download folder and execute:

fastboot flash recovery twrp.img

Step 6. After that, Execute -

fastboot flash recovery twrp.img

(Rename the recovery image name to twrp.img)


How to Root 
Motorola Moto G5s Plus-

Step 1. Download Superuser or Magisk zip from below.

Step 2. Go to recovery by First going to fastboot and choosing recovery by first pressing down volume then up volume buttons.

Step 3. Select Install zip from Sdcard and select Superuser zip, you downloaded in Step 1.

Step 4. Reboot your Phone.

Downloads


TWRP: Download Here (Thanks to GeneticEnginer)

SuperSu ZIP: Download Here

Magisk: Download Here

Systemless root method now available for the Pixel and Pixel XL

Systemless root method now available for the Pixel and Pixel XL


As promised earlier by Chainfire, systemless root for the Pixel and Pixel XL is now available. 


One can easily root their Pixel/Pixel XL (Thanks to Chainfire). You just need to unlock your Pixel/Pixel XL's bootloader and Install the SuperSU 2.78 SR2, which will enable su access without touching anything in the system partition and allow dm-verity to be toggled.

You can go through full XDA developer Guide of rooting Pixel and Pixel XL.

Source:- Chainfire

[Poll] Is your Motorola Phone rooted ?

Image - via


Rooting voids warranty ? It does ! But it also unlocks many features and gives users to fully access their Android system . Rooting has many advantages , You can Install Custom Roms , Use Apps like Greenify , Titanium Backup etc and many more ...

But To Root Motorola Devices , Usually You have to Go through many Steps which Includes - Unlocking Bootloader > Install Recovery > Rooting the Device !

Here at MotoMobile , We have a Moto G 2nd Generation ( Rooted ) and a Moto G 3rd Generation ( Non Rooted ) , What About You guys ? Select your Answer below and let us know !

Use your Smartphone Screen in Landscape mode ( Rotate your Screen ) ( For better view of Poll ) !


Also Comment below , Why you have Rooted or Not Rooted your Smartphone !

Root and Install TWRP recovery on Moto G 2nd Gen ( Marshmallow )

Recently Moto G 2nd Generation users got Marshmallow update via Soak test , Even Marshmallow soak test was captured for XT1069 and is now available for download , Even users can install this update on XT1068  .


Read Here - [OTA][Download] Official Marshmallow for Moto G 2nd Gen XT1069


Now users can root and install TWRP custom recovery on their Moto G 2nd Generation ( XT1069 ) and ( XT1068 - if running above Marshmallow firmware ) on Android 6.0 Marshmallow .


How to Install TWRP recovery on Moto G 2nd Generation ( Marshmallow ) -

Step 1. Download Root_titan_M zip from below .

Step 2. Go into bootloader mode (power off and hold power+vol down and release)

Step 3.Connect the phone to your PC

Step 4.Open the zip downloaded following step 1.

Step 5. Run the .bat file ( which you will get after extracting [Step 1 zip ] ) .


Downloads -

Download - Root_titan_M.zip ( .bat file inside )


How to Root Moto G 2nd Generation -

Step 1. Download Superuser zip  from below .

Step 2. Go to recovery by First going to fastboot and choosing recovery by first pressing down volume then up volume buttons .

Step 3. Select Install zip from Sdcard and select Superuser zip , you downloaded in Step 1.

Step 4. Reboot your Phone .

Downloads -

Download - Root Superuser zip 


via - Xda

Root Motorola Moto G 3rd Generation

It has been only few days that Motorola Moto G 3rd Generation has released by Motorola , And developers has started building Recoveries and roms for this device .


Root is required if you want to Install some apps that require root . 
Motorola Moto G 3rd generation can easily rooted by following below steps . 

Root Motorola Moto G 3rd Generation


First You need to - 


How to Root Motorola Moto G 3rd Generation -

Step 1. Download Superuser zip from below .

Step 2. Boot to recovery mode 

Step 3. Select Install Zip from SDcard .

Step 4. Select Superuser zip , you downloaded following Step 3 .

Step 5. Reboot .

Downloads - 

Superuser - Download Here


How to root Nexus 5 on Android M


Google Recently Announced Android M and its readily available for Nexus 5 users . Nexus 5 users can update their Smartphone's with Android M developer preview images .


As Android 5.0 Lollipop was very hard to root , but somehow many of the developers found a way to root Devices running on Android 5.0 Lollipop . But with the upgrading version of Android , its getting harder to Root the devices on latest Android . 

But , This time also Android M developer preview is root able and Here is how you can root your Nexus 5 running on Android M developer preview .


Note - We are not responsible for any damage caused to your smartphone , do all steps with care .


How to root Nexus 5 on Android M dev preview -

Step 1. Download Superuser and Despair kernel from below .

Step 2. Boot to recovery mode ( any Twrp , Cwm ) 

Step 3. Flash the kernel ( Despair kernel ) which you downloaded following step 1.

Step 4. Now again Flash the Superuser zip file which you downloaded following step 1.

Step 5. Reboot your Nexus 5 .

Downloads -

Superuser - Download Here

Despair kernel - Download Here


[Update] How to Install Cwm / Twrp Custom Recovery On Samsung Galaxy Core ( I8262 / I8260 )

Samsung a year ago launched Samsung Galaxy Core , That was pretty impressive Smartphone and Most of the people Purchased that Smartphone . Not only in India , It was Launched In - Indonesia , Philippines and more countries . In Some Countries , It was available in Dual sim ( I8262 ) only and In some Countries it is available in Single sim ( I8260 ) .


So the Previous Guide for Installing CWM / TWRP recovery for Samsung Galaxy Core is not working , Actually the new firmware of Samsung Galaxy Core has been working as a barrier for Installing Recovery via odin .


The Problem is When we Install Recovery via Odin , It did installs from Odin but actually the recovery is not Installed on Samsung Galaxy Core .

So Now i m posting a new method to Install Cwm / Twrp Custom Recovery On Samsung Galaxy Core ( I8262 / I8260 ) -

Note - Root Your Galaxy Core first then perform the below steps - Root Galaxy Core using This guide 

Step 1. Download the recoveries from below ( Download Section ) , I recommend TWRP recovery .

Step 2. Download Rashr - Flash Tool App from Play store .

Step 3. Give it Root Permission from SuperUser .

Step 4. Select Recovery From Storage option and Choose the Recovery Image you downloaded from below .

Step 5. Now Select Install and The Recovery Will be Installed .

Step 6. To boot to the recovery Switch Off then Press Volume Up + Home + Power Button .


Downloads - 

TWRP Recovery - Download Here

CWM Recovery - Download Here


How to Root Micromax YU Yureka

Newly launched Micromax Yureka , Indian handset which comes with CyanogenMod is now all ready for further development !


The first stage to start modding and development is to Root your Smartphone , Rooting unlocks the Smartphone fully ! Also In Micromax Yureka , your Warranty will not get void by Rooting .


First Follow these Guides before Following the steps for Rooting ! -
How to Unlock Bootloader of Micromax YU Yureka

How to Install CWM ( Custom Recovery ) On Micromax YU Yureka

After following the steps above follow these steps Of how to Root your Micromax YU Yureka  -


Step 1. Download the Superuser.zip from  here

Step 2. Boot to CWM recovery mode , by pressing volume up + volume down + power button .

Step 3. Select Install zip from Sd card and Select Superuser.zip 

Step 4. Reboot your Device ! 


How to Root Samsung Galaxy Core 2 SM-G355H

Samsung Galaxy Core 2 SM-G355H is the upgrade version of Samsung Galaxy Core . Root is very usefull in Installing Custom roms and Many apps requires root . 


So Now Samsung Galaxy Core 2 SM-G355H Users can now root their Smartphone with Simple steps Given below -

Step 1 - Download KingUser Root file from - Here 

Step 2 - Place the file in your SDcard ( External SDcard ) 

Step 3 - Now Power off your Samsung Galaxy Core 2 and go to  Recovery mode by pressing VOLUME UP + POWER + HOME button at the same time .

Step 4 - Now you will see Some Options ( Use Volume keys to move up and down and Power button to choose )


Step 5 - There Choose apply update from external storage and select the zip you downloaded in Step 1 .

Now your  Samsung Galaxy Core 2 SM-G355H is rooted , Enjoy !

How to Root Google Android one Smartphone : Micromax Canvas A1, Spice Dream Uno, Karbonn Sparkle V

Google's new Android One , That is launched by Micromax , Spice and Karbonn comes with Android 4.4.4  Kitkat out of the box and is the best Smartphone in this range . Android one comes with 4.5 inch HD display , Moreover it comes with Dual Sim capablities and Removable MicroSD card . 


After all Android One is purely made of Android Os , no modifications are done in the Interface . So developers rooted it After it Hits the stores .


Also see - How to Install cwm recovery on Android one

Required -

1. Any Android One Smartphone ( Micromax Canvas A1, Spice Dream Uno, Karbonn Sparkle V ) With CWM recovery Installed .


How to Root Google's Android One Smartphone -

Step 1. Download SuperSU file from below

Step 2. Enter into recovery mode

Step 3. Go to Install zip > ADB sideload

Step 4. Connect your Phone to PC

Step 5. Run the following command -   adb sideload

Step 6. Enjoy your rooted device .

Downloads -

SuperUser - Download Here

How to Install Cwm / Twrp Custom Recovery On Samsung Galaxy Core ( I8262 / I8260 )

Update - [Update] How to Install Cwm / Twrp Custom Recovery On Samsung Galaxy Core ( I8262 / I8260 )

Use the Above Guide and Below one is not working on some firmwares .


Samsung a year ago launched Samsung Galaxy Core , That was pretty impressive Smartphone and Most of the people Purchased that Smartphone . Not only in India , It was Launched In - Indonesia , Philippines and more countries . In Some Countries , It was available in Dual sim ( I8262 ) only and In some Countries it is available in Single sim ( I8260 ) .


How to Install TWRP Custom Recovery On Samsung Galaxy Core ( I8262 / I8260 ) -  ( no bugs )


Step 1- Download TWRP recovery File from - Here


Step 2 - Download Odin Software for PC from - Here 


Step 3 - Download Samsung Galaxy Core Drivers from - Here

Step 4- Install Samsung Galaxy Core Drivers on Your Windows ( PC ) 


Step 5- Open Odin Software as Administrator 


Step 6 - Select PDA section and Select TWRP.tar Recovery 


Step 7 - Put your Samsung Galaxy Core Into Download Mode , By Pressing Volume down + Home + Power Button 


Step 8 - Press Volume Up and Then you will go To Download Mode 


Step 9 - Connect Samsung Galaxy Core to  PC via Usb cable .


Step 10 - You will See Yellow Signal , Then Select Start in ODIN and Your recovery will be Installed :D  ..


To test Recovery - Press Volume up + Home + Power Button 


Credits - NovaFusion

How to Install CWM Custom Recovery On Samsung Galaxy Core ( I8262 / I8260 ) - ( Some bugs )


Step 1- Download CWM recovery File from - Here


Step 2 - Download Odin Software for PC from - Here 


Step 3 - Download Samsung Galaxy Core Drivers from - Here

Step 4- Install Samsung Galaxy Core Drivers on Your Windows ( PC ) 


Step 5- Open Odin Software as Administrator 


Step 6 - Select PDA section and Select CWM.tar Recovery 


Step 7 - Put your Samsung Galaxy Core Into Download Mode , By Pressing Volume down + Home + Power Button 


Step 8 - Press Volume Up and Then you will go To Download Mode 


Step 9 - Connect Samsung Galaxy Core to  PC via Usb cable .


Step 10 - You will See Yellow Signal , Then Select Start in ODIN and Your recovery will be Installed :D  ..


To test CWM Recovery - Press Volume up + Home + Power Button 


Credits 

Rooting Guide For Samsung Galaxy Core ( I8262 / 8260 )

Samsung a year ago launched Samsung Galaxy Core , That was pretty impressive Smartphone and Most of the people Purchased that Smartphone . Not only in India , It was Launched In - Indonesia , Philippines and more countries . In Some Countries , It was available in Dual sim ( I8262 ) only and In some Countries it is available in Single sim ( I8260 ) .


How To Root Samsung Galaxy Core  - 


Method 1 - Only works on Stock Rom 


Step 1- Download iRoot app from - Here


Step 2- Install iRoot app on Samsung galaxy Core ( Dual / single )


Step 3-  Open iRoot app and Select Install Root or Root device .


Step 4 - Reboot and You are done . 


Method 2 - Works on Custom roms 


Step 1- Download The zip file from - Here

Step 2 - You must have Custom Recovery Installed - If not then Go - Here 

Step 3 - Go to recovery mode by Pressing - Volume Up + Home + Power button 

Step 4 - Select Install zip from Sd card and Select the above Downloaded Zip .

Step 5 - Reboot System Now